Sunday, December 30, 2012
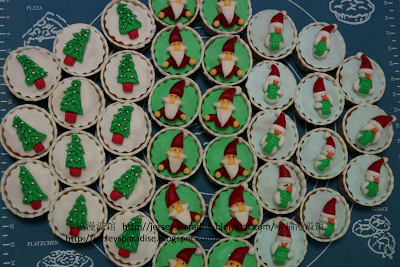
爱心圣诞翻糖小蛋糕
圣诞节的来临!也是感恩的季节!
我不能同行,但却想给孩子们来个惊喜,来个同欢庆,享受那份漫溢的喜悦。
原本只有圣诞老人,想想红色素太多了,就这样雪人,圣诞树也加入了阵容。
凌晨十二时才开始玩翻糖,真是越玩越精神,七小时换来三十六个小可爱。看了成品,是超级满足,毕竟它可是我的初女座。
三种照形,那个会是你的最爱呢?还有雪人还是动作多端,六个小动作噢!
当当当,要出发了。。。。
翻糖食谱参考鱼鱼家。 我用的分量如下:-
材料:
25g 无味鱼胶粉 (Geletin)
1/4 cup 开水 (Room Temperature Water)
1/2 cup 葡萄糖浆 (Glucose)
1 tbsp 甘油 (Glycerine)
2 tbsp 白油 (Shortening/Crisco)
2kg 糖粉(Icing Sugar, sifted) *我只用1kg多。糖粉多与少,以粉团柔软度为准。
做法:
1。把鱼胶粉放入一个干净的小碗,加入开水。放置一旁在待鱼胶粉被开水渗透,再隔水煮溶至完全熔化。
2。加入葡萄糖浆,调均;再加入甘油,再调均。
3。等冷却后再加入糖分里。
4。搓揉糖浆和糖粉,确保完全融合在一起。
5。加入白油,搓揉均匀,直到它变成一团糖粉团。
6。分割成小团,再调色。上色时要慢慢加至所要的颜色。
7。用保鲜膜包好,收进密封的盒子里保存。
8。再取所要的分量,开始翻玩。
至于牛油蛋糕,我采用了所爱的食谱如下:-
念念不忘的牛油杯子蛋糕 ~ Butter Cup Cake
Tuesday, November 6, 2012
Doi Doi Milo Pudding
Doi Doi Milo Pudding
Nice to enjoy it in such hot weather!
Ingredients:
4g or 1&1/2 tsp Agar-agar Powder
750g Water
75g Sugar
200g Fresh Milk
2tbsp Milk Powder melted in 100g Hot Water
Steps:
Mix agar-agar powder, sugar and water, cook till boil.
Add in fresh milk, continue to stir till boil.
Last add milo, stir and let it boil.
Transfer to pudding cup and let it set.
Keep in the fridge and serve while cool.
Wednesday, October 24, 2012
情浓巧克力乳酪蛋糕 @ Romance Dark Chocolate Cheese Cake
情浓巧克力乳酪蛋糕诱惑!!!
6。切芝士蛋糕的时候,先把刀用热水浸泡一下再切,就可以切得漂亮,平整了。每切一刀,都要把刀擦拭干净并重新预热一下,再切下一刀。再享受这情浓巧克力乳酪蛋糕诱惑吧!
你受得了这诱惑吗?
真是又爱又恨,但还是大快朵颐。
解相思之瘾。
好像好久没玩烘烤了,
就连我家小宝贝也一直嚷着说Cake Cake。
不止说,还一直指着烤炉,望了又望。
因为这样,我又有机会尝试新食谱。
这回应用了君之的好食谱。
我小改了食谱如下,做了双倍。
蛋糕低:150g 消化饼干(压成碎末状),
75g 牛油(隔水加热成液体状)
蛋糕体:500g 乳酪,100g 白糖,4粒蛋,
120g 动物性奶油,1/2tsp Vanilla香精
情浓巧克力表层:120g 70%黑巧克力,
100g 动物性奶油,30g 牛油
做法:
1。把消化饼干碎末倒进黄油里,拌均。
倒进8寸的蛋糕模,均匀铺在蛋糕模底部,用小勺压平压紧。铺好饼干底后,以120度烘烤10分钟,待冷后把蛋糕模放进冰箱冷藏备用。
2。搅拌乳酪,糖,再加入鸡蛋。拌均后再加入动物性奶油,再搅拌均匀后倒入蛋糕模。
3。把蛋糕模放在较大烤盘里(如果是活底模记得包上锡纸,以防进水),并在烤盘里注入1/3清水。
放入预热烤箱,160度,烤60分钟。
(时间,温度共参考,看个人烤箱而定)
烤好的乳酪蛋糕取出以后,先不脱模,连同蛋糕模一起冷却到室温。
4。在等待乳酪蛋糕冷却的时候,将巧克力和牛油切小块,放入大碗里,加入动物性奶油。再将巧克力大腕放入另一个盛着热水的大大腕,隔着烧水不断搅拌至完全融化。
5。趁巧克力混合液温热,把它倒入乳酪蛋糕上。待巧克力混合液变得平整后,将蛋糕模放入冰箱,冷藏4个小时以上。脱模候,用小刀沿着蛋糕模壁划一圈,就可以脱模了。
Monday, September 10, 2012
浪漫北海道蛋糕 Hokaido Chiffon Cake
红白绝配
还蛮喜欢与这款纸杯的配搭
小小杯也不错
买不到草莓,就来个香橙配巧克力
柔软,细腻的蛋糕体
加上植物性奶油,淡淡的甜,不会腻噢
回应朋友的询问,发上早期的作品
这可是我们一家大小,还有朋友及同事们的爱爱
食谱:
(A) 6 Egg Whites
40g Sugar
1g White Vineger
(B) 4 Egg Yolk
10g Sugar
30g Corn Oil
30g Fresh Milk
(C) 2g Baking Powder
80g Cake Flour
(or 70g plain flour + 10g Corn Flour)
Fillings:
100g Whipping Cream
Fruit or other as per preference
Method:
Whisk (A) egg white, slowly add in sugar and vineger slowly, and whisk until soft peak. Set aside
Mix (B) egg yolk with sugar, corn oil and fresh milk.
Slowly add in (C) to egg yolk mixture con-currently add in the egg white mixture. Stir in till well combine will do.
Scoop into the baking cup till 80% full.
Bake at preheat oven, 170C for 18-20mins or till well golden brown.
Let it cool. Whip the whipping cream and docor accordingly.
Thursday, September 6, 2012
热恋中,还是冷藏液种
热恋包包大家庭
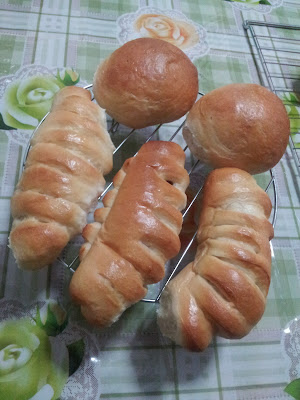
简单爱 - 牛奶面包
香气十足肉桂面包卷 vs 简单爱
香肠相依 ~ 当肠肠遇上圆圆
热恋中的我,当然还是与冷藏液种纠缠不停。
下午三时三十分,开始打粉团;晚上九点才进烤箱。
慢工出软包,好好吃哦!
恋上冷藏液种
个个都精彩
我恋爱了,而且是超级热恋。
他的柔,他的细,他的香,令我无法自拔,一直恋恋不忘。
绝对是我的爱爱!
感恩你们的分享,大力推荐。
食谱来自莎莎家及Bernice家。
冷藏液种:
300g 高粉
300g 水
1g 即溶酵母
所有材料混合完全均匀后,室温发酵1小时后,盖上保鲜膜,
收入冰箱冷藏至少16小时,备用。
注:剩余的冷藏汤种可在七天内使用。
材料:
250g 冷藏液种
350g 高粉
90g 糖
6g 盐
6g 即溶酵母
15g 奶粉
150g 牛奶
40g 无盐牛油
做法:
1. 将所有材料后油法搅拌至可撑薄膜的完全状态。
2. 基本发酵至2-2.5倍大。
3. 排气,把面团分割,滚圆松弛15分钟。
4. 制造照形,进行最后发酵至双倍大。
5. 最后送人已预热烤箱200度C,15分钟。
Monday, August 27, 2012
Little Surprise Earl Grey Chiffon Cake
Cant wait to have a slice..
Unmould successfully with free hand, pretty happy with the result
When thinking what to bake for little one, chiffon cake always my number One choice. Furthermore, I am to bake for two little one, Owen and Isaac. It will be a little surprise for little one Isaac and Mommy.
I make a twist with the Lipton Tea Chiffon Cake recipe, right here let welcome a new member to my chiffon cake family.
A soft and full of earl grey flavor chiffon cake. Mum Mum, all of us enjoyed it much.
Ingredients A:
6 nos Egg White (from full egg weight 55-60g)
60g Sugar
¼ tsp Tartar Powder / Cream of Tartar
Ingredients B:
5 nos Egg Yolks
25g Sugar
1/4 tsp Salt
100g Earl Grey Tea
80g Corn oil
Ingredients C:
125g Cake flour (or 110g Plain Flour + 15g Corn Flour)
1/4 tsp Baking Powder
¼ tsp Baking Soda (can be omitted)
Ingredient D:
1 sachet of Earl Grey Tea Leaf
Method:
1.Whisk egg white with electric mixture, add in tartar powder. Slowly add in sugar, 1/3 each per time and whisk till soft peak. Set aside.
2.Whisk egg yolk, sugar and salt with hand whisk. Add in earl grey tea, mix well. Then, add in the corn oil, again mix well.
3.Stir in ½ of the flour from ingredient C into egg yolk mixture. Fold in some egg white, continue to add in the remaining flour, stir till well combine.
4. Lastly combined the egg yolk mixture with the egg white mixture. Add in the earl grey tea leave and fold in till well combined.
5. Pour into chiffon baking tin, bake at preheat oven, 170C for 45-50mins.
Thursday, August 16, 2012
Blissful New York Cheese Cake
Blissful NYCC special made for our Blessing Gathering hosted by our pretty Bride-To-Be.
"Happy Marriage begin when we marry to the ones we love,
and they blossom when we love te ones we marry"
Congratulations! A happy and blissful marriage for our lovely couple!! Cheers............
** NYCC from my usual favourite recipe as always!
Friday, August 10, 2012
Makeover New York Cheese Cake
This is the 2nd Birthday Cake which i baked for my best childhood friend's mother.
Basically i baked the same New York Cheesecake for her for the two consecutive year.
This time round i did some makeover, top with the chocolate ganach topping. And yet it turned out to be extra-excellence that again suit all of their liking.
I am glad that they enjoyed it so much.
Happy Birthday to Aunty, and
Speedy be well to Sharon.
Recipe as per my early post back in year 2011.
New York Cheese Cake Recipe
For the Chocolate Ganach:
100g 70g Dark Chocolate
80g Whipping Cream
Method:
Double boil and melt the chocolate together with whipping cream, mix well and pour over to cheesecake.
Let it cool and chill in the fridge.
Served after it fully chilled for about 4-5 hours.
Colorful Fruits Tart II
Another batch of colorful fruits tart with the left over tart case and filling.
This time round i tried out with some other design. Mmm, i would say prastice make perfect! No perfect yet but i think it is closer to what i expect to be.
My next venture should be a big giant fruit tart. Hehe...looking forward for it!!
Monday, August 6, 2012
Colorful Fruits Tart
Colorful fruits tarts that make my day!
Stay foolish, stay hungry for new baking experience.
Recipe adopted from Vinnie Baking Paradise and Dailydelicious . Many thanks to both sweetie.
Tart Shell :-
100g Butter - I prefer salted butter
50g Icing Sugar
210g All Purpose Flour
30g Egg
Method:
1. Sift flour and icing sugar in a bowl.
2. Add in the cold butter cube and rub to form crumb.
3. Add in egg and mix well till form a ball. Clip wrap and keep in fridge for 30mins.
4. Shape in the tart mould and bake at 200C for 15-20mins.
Cream Patissiere :-
200g Milk
50g Sugar
3 Egg Yolk
15g Plain Flour
10g Corn Flour
Vanilla Seed from 1/s Vanilla Bean - i used 1/4 tsp Vanilla Oil
10g Cointreau (orange liqueur) - i used Lemon Juice
Method:
1. Bring milk to boil.
2. Whisk egg yolk, sugar, plain flour, corn flour and vanilla till well mix.
3. Add the milk into egg yolk mixture and bring back to boil and boil for one minute, whisk constantly to avoild starchy.
4. When it is boil, whisk for another 30-60 secs till it become thick and slightly hard to stir.
5. Remove from the heat and add in lemon juice, pour into a bowl and cover it with a platics wrap to prevent a crust forming. Set aside to cool.
Cream Chantilly :-
200g Whipping Cream
10g Icing Sugar
Method:
1. Whisk whipping cream and icing sugar till soft peaks.
Filling :-
1. Fold the cream chantilly into cream patissiere.
2. Spoon the filling into a piping bag fitted with the nozzle.
Apricot Glaze :-
50g Apricot Jam - i used Orange Jam
some water
Method:
1. Heat the apricot jam together with water.
2. Strain the jam through a fine strainer to remove any fruits lumps.
Assemble :-
1. Prepare the fruits as desired shape and place on the paper towel to absorb the moisture.
2. Brush the tart with apricot glaze and wait for it to dry for a bit then pipe in the filling.
3. Top the tarts with fruits and glaze with apricot glaze.
4. Refrigerate for 1hour before serving.
Note:
For fruits tart, it is the best to consume within the same day.
Monday, July 30, 2012
Sweet Memory Pancake
Pancake, one of the simple yet delicious breakfast!
I love pancake, it's remind me on our trip to Koh Sa Met Island; excellence banana pancake, sweet memories and 1st experince going for a trip together, being together ^^
Pancake Recipe
Ingredients:
130g All-purpose Flour
2tsp Baking Powder
¼ tsp Salt
1 tbsp Sugar
2 Large Eggs
200g Milk
2 tbsp Unsalted Butter, melted or 2 tbsp Corn Oil
Banana slices as desired
Method:
Mix dry ingredients in a bowl. Whisk eggs until mixed thoroughly. Pour into dry ingredients, along with milk and oil. Mix until batter is smooth.
Grease a pan with butter or oil on a medium-low heat. Place small spoonfuls of batter into pan or large spoonfuls depending on the size of pancake you desire.
Flip pancake when small bubbles appear on the pancake surface. Cook both sides until light golden brown.
Recipe from one of the recipe book which i forgot to write down the name :P
Monday, July 23, 2012
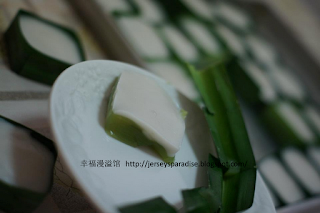
重温其魅 ~ Kuih Tako
老友的一通来电,让我翻开中学时期的食谱笔记。我俩不常见面,通电;但喜欢烹饪,研究美食却紧紧的把我们连续再一起。依然记得,我俩组队,一起代表圣约翰参加烹饪比赛,还领了亚军回来。回忆起往事,那画面依然清晰。
她向我要了Kuih Tako食谱,我想还是先试一试好,毕竟那食谱也十多岁了。而我们也随着岁月,喜欢甜度的尺寸也有些改变。
食谱(35个):
翡翠层:
75克 绿豆粉
720克 斑兰水
120克 糖
8粒 马蹄(切小粒)
少许 平四 (我没放,新国每得买)
椰香层:
45克 绿豆粉
360克 水
360克 椰奶 (我用Kara包装椰奶)
115克 糖
少许 盐
少许 平四 (我没放,新国每得买)
做法:
1。拌入翡翠层材料,除马蹄之外,用中火煮至浓稠及透明。
2。把翡翠糊放入以预备好的斑兰杯(马蹄粒现放入杯杯里),放至满半杯。
3。接着拌入椰香层材料,同样用中火煮至浓稠。
4。再将椰香糊放入翡翠层上,致满分。
5。冷却后再放入冰厨里。冷冷的,最好吃。
也可参考Wendy的食谱@,还有她详细解释该怎样准备
斑兰杯。谢谢!我可以走short cut咯!不必再去折斑兰杯,拍照,解说。嘻嘻!
Kuih Tako Recipe (about 35 pieces medium case)
Pandan Layer:
75g Creen Bean Flour
720g Pandan Juice (Pandan Water extract from Pandan leave)
120g Sugar
A pinch of "Peng Si" (Omitted, cant get it from Singapore)
8 Water chestnuts, peeled and cut to bite-size
Coconut Layer:
45g Green Bean Flour
360g Water
360g Coconut Milk, from Kara's packaging milk
115g Sugar
A pinch of "Peng Si" (Omitted, cant get it from Singapore)
A pinch of Salt
Method:
1. Mix all pandan layer ingredients except water chestnuts, cook over medium low heat until thick and transperent.
2. Scoop over to prepared pandan casings which already ready with water chestnus.
3. Next, mix all coconut layer ingredients, cook over medium low heat till thick or well cook.
4. Scoop over to pandan layer.
5. Leave it cool at room temperature then store into fridge. Served cool.
Cross reference recipe from Table for 2
You may see the pandan casing preparation from Wendy's site.
Table for 2
Thursday, July 19, 2012
心动蒸润湿巧克力蛋糕
小宝贝玩足了整个下午,精神饱满的他终于累了。晚上八点,就呼呼大睡。妈咪就如其所愿,终于可以开工了。嘻嘻!感觉太真好了,上午说愿,晚上就实现。
心动蒸润湿巧克力蛋糕就这样出现了。这可是BakingWonderland好流行的通杀蛋糕噢!
食谱取自BakingWonderland - Wiki Soo, 谢谢您的分享。
(A) 180g 牛油
150g 糖
200g 淡奶
(B) 2nos 蛋
(C) 100g 中荕面粉
50g 可可粉 (Hersey's Cocoa - Natural Unsweetened)
1/2 tsp 发粉
1/2 tsp 苏打粉
(A)隔水煮溶,待冷。加入(B),搅拌均匀。
再拌入(C),搅拌均匀后倒入烤盘。
盖上锡纸,中火蒸45分钟。
冷却后淋上巧克力浆。
巧克力浆
100g 炼奶
2tbsp 粟米油
20克 可可粉
少许盐
隔水搅拌均匀。若太浓,可加奶水。喜欢较苦的朋友,可以加可可粉。
随意发挥你所喜爱。
Monday, July 16, 2012
简易马分
想念小品时,就来个简易马分。把干材料拌入湿材料,在轻微的搅拌均匀就好了。放入纸杯,送入烤炉。简简单单,前前后后少过一小时,简单美味的小品就呈现在你眼前。
食谱参考Min's Blog
口感很优的蓝莓优格马芬
这回我以葡萄干取代蓝莓,也一样好吃。但是,我还是偏爱"Creaming Method"的马分。嘻嘻!
而这类"Mixing Method"马分,通常我是在晚上烘烤的,没有吵扎得搅拌声,确实是适合夜深人静的夜里。
回忆:上回我以Prune取代蓝莓,黑糖取代白糖,口感超好!可以试一试噢!
Sunday, July 15, 2012
Sunday, July 8, 2012
Wednesday, June 20, 2012
粽子飘香!阿嫲,我想您了。。。
阿嫲,我想您了。。。
端午节,也是阿嫲的纪念日。迈入第三年,还是一个让我特别想念的日子。想念您,我敬爱的阿嫲!
家里,妈妈还跟着习俗,不得裹粽子。而出嫁了的我,就和家婆联手裹粽子。家婆帮我准备材料,而我就献出我的第一次,第一次自己炒粽子配料,感觉好好噢!
星期六的上午炒料,隔天上午炒米后,我们就一起裹粽子。下午二时半,香喷喷的传统肉粽就可大快朵颐了。大伙儿吃的津津有味,都赞好。
2.5公斤的糯米,裹出53了粒粽子。30粒出家,送给亲戚朋友。其余的就掉进我们的肚子里,再消化消化!
材料(A):
2.5公斤糯米 (洗净滤干)
食油适量
200克小葱头
调味:
黑酱油,酱青,蚝油,盐
材料(B):
1.5公斤三层肉
600克栗子
30朵香菇(浸软切片)
200克虾米
25粒咸蛋黄(切半)
200克蒜头
调味:
五香粉,胡椒粉,芫茜粉,黑酱油,酱青,蚝油,盐,糖
注:小火煮2.5-3小时或致熟透
Thursday, June 7, 2012
Mango Cake 芒果蛋糕
芒果香!芒果甜!我的首个芒果蛋糕,逗得大家心甜甜。
老公,家婆吃了都说好好吃噢,而我心更甜。芒果蛋糕,成功!:)
戚风蛋糕体:7寸活动摸
(A)4 颗 蛋黄(大)
60克 牛奶
50克 粟米油
90克 低粉
(B)4 颗 蛋白
75克 糖
1/8茶匙 塔塔粉
一般戚风做法。烘160度,45-50分钟。出炉后马上倒扣至凉。
* 戚风食补忘了来自谁的家,我只减了5克糖分。谢谢你!
蛋糕装饰:
200克 植物鲜奶油
芒果粒,芒果片;取自3粒芒果
少许草莓
Saturday, May 19, 2012
我也闹相思 "绿茶相思蛋糕"
我也赶上潮流闹相思! 来个绿茶口味,但没有绿茶味道,下回该加放 1/4 + 1/8 tsp 的绿茶粉再试一试。 半个蛋糕是我们的早餐,另一半送出去,大家都喜欢!打算明天再战,烘一个送走。
食谱参考相思高手@ Swee Hwei· 简单生活,随心所欲,快乐充实 , 谢谢!
Wednesday, May 16, 2012
醒觉 ~ Please Wake Up
2010年的某一天,无意中闖入美食,烘烤高手们的部落格,深深的被吸引着。而漫游部落:偷师,偷吃,白吃,梦游;不知不觉就走入了我的生活。
游啊游,就在同年的六月游出了我的幸福漫溢馆。电脑白痴的我,就这样迷迷糊糊的开始上稿。开开心心的玩烘烤,上菜;但却不用心耕耘部落。来来去去,就只懂得那基本上稿功,其它的真的不懂。怪只怪自己,懒得去探讨,摸索。羞羞!
我想,是时候醒觉了。是时候好好的灌溉,施肥来耕耘我的小天地。
部落高手,兄弟姐妹, 借此机会,真心地向您道歉,若不小心偷走了您的食补而没连线或注明。我会努力去研究怎样连线,发誓!
感恩您无私的分享,衷心地谢谢您!
而今天我刚发现了新大陆,我会一一把你们列入,继续跟随及继续漫游。再次谢谢你们。
One day in 2010, 1 accidentally ran into Baking and Food Master’s blogs and deeply attracted by all. Roam blogs, steal ideal, eat for free and even sleepwalking, unknowingly ran into my life. .
Keep roaming, and finally in June the same year, finally my homewas created. Being a computer ideal, I stumbled to start blogging. Happily playing with baking and cooking, however I don’t really put much attention in blogging. Basically I only know the simple upload a post and I really don’t know and don’t understand the other aspects. What to do, I can only blame myself for the laziness, too lazy to explore the aspect of the blog design & etc. Indeed shame shame!
It is the time for me to wake up. It is the time for me to work hard and fertilize my little world.
To all Blog Master, Brothers and Sisters, I would like to take this opportunity, my sincerely apologize to you all, if I ever accidentally steal your recipe without any linkage or connection, I promise, from now onwards, I will really study how to create the connectio !
Really thankful for your selfless giving, my heartfelt.
And today I just discovered something new, I will slowly add all of you in my blog list. Continue to follow and continue roaming. Thank you again.
游啊游,就在同年的六月游出了我的幸福漫溢馆。电脑白痴的我,就这样迷迷糊糊的开始上稿。开开心心的玩烘烤,上菜;但却不用心耕耘部落。来来去去,就只懂得那基本上稿功,其它的真的不懂。怪只怪自己,懒得去探讨,摸索。羞羞!
我想,是时候醒觉了。是时候好好的灌溉,施肥来耕耘我的小天地。
部落高手,兄弟姐妹, 借此机会,真心地向您道歉,若不小心偷走了您的食补而没连线或注明。我会努力去研究怎样连线,发誓!
感恩您无私的分享,衷心地谢谢您!
而今天我刚发现了新大陆,我会一一把你们列入,继续跟随及继续漫游。再次谢谢你们。
One day in 2010, 1 accidentally ran into Baking and Food Master’s blogs and deeply attracted by all. Roam blogs, steal ideal, eat for free and even sleepwalking, unknowingly ran into my life. .
Keep roaming, and finally in June the same year, finally my home
It is the time for me to wake up. It is the time for me to work hard and fertilize my little world.
To all Blog Master, Brothers and Sisters, I would like to take this opportunity, my sincerely apologize to you all, if I ever accidentally steal your recipe without any linkage or connection, I promise, from now onwards, I will really study how to create the connectio !
Really thankful for your selfless giving, my heartfelt.
And today I just discovered something new, I will slowly add all of you in my blog list. Continue to follow and continue roaming. Thank you again.
椰香翡翠菜燕蛋糕
Ingredient:
12g Agar-agar Powder (I used ½ pack Bintang Emas Brand Agar-agar Powder)
1150ml Water
110g Sugar
450g Coconut Milk (I used packed coconut milk)
3-4 Pandan Leave (tie into small knot)
Pandan Paste for coloring
Method:
1. Boil the agar-agar powder, water and sugar together. Stir constantly.
2. Pour in coconut milk and bring to boil again then off the fire.
3. Discard the pandan leaves and stir it occasionally.
4. Transfer some agar-agar liquid in a separate boil, add in pandan paste and create desired color.
5. Pour some pandan agar-agar liquid into jelly mould, let it set 1st then add in some plain agar-agar liquid for the next layer. And continue the same step with the remaining agar-agar liquid.
6. Once finished all the layers, chill it in the fridge for few hours before serve.
* I put the jelly into the freezer to let it set fast. For the pandan agar-agar liquid, I will keep top up from the plain agar-agar liquid and add in the pandan paste for desired color. This to keep the liquid warm and to prevent it set quickly. Do warm up the plain agar-agar liquid if needed.
* Use a small knife/folk to gentle scratch on the agar-agar layer before adding in next layer agar-agar liquid to ensure the jelly stick together.
Monday, May 14, 2012
解渴之糯米饭 aka Steamed Glutinous Rice
Main Ingredient:
A) 18 Shallots (peel and slice thinly)
B) 200g Guo Hua Bak or Pork Belly (cut cube)
1 or 2 stick Chinese Sausage (cut cube)
100g Dried Prawn (slightly chop)
12 Dried Shitake Mushroom (wash, soak & cut cube)
C) 500g Glutinous Rice (wash and soak overnight or atleast 4 hours)
Seasoning:
1 tbsp Dark Sauce
½ cube Knorr Vegetable Cube (or 2tsp salt + 1 tbsp light soya sauce to taste)
1 tbsp Sugar
Garnishing:
Fried Shallots
Spring Onion or Parsley
Method:
1. Heat the oil and fry the shallots till golden brown. Dish out and set aside to cool.
2. With the remaining shallot oil, fry meat, Chinese sausage, dried prawn and mushroom till aromatic.
3. Add in drained glutinous rice and seasoning. Stir and mix well.
4. Transfer the rice to rice cooker, add in 1 cup of water and cook as normal white rice. Stir in between and cook till well cooked. * I cooked for 2 times using the Phillip rice cooker for normal white rice. After 1st time cooked, I stirred and added in some water then continued to cook for 2nd time.
5. Serve glutinous rice with fried shallots and spring onion or parsley.
Tuesday, April 3, 2012
Barney Cake vs 宝贝一岁生日!
26032012 宝贝一岁咯!妈咪只好再来一个Barney蛋糕。Barney可是宝贝的最爱,常常偷走宝贝的目光。他看Barney可是超专注的。。。
宝贝,生日快乐!Mummy & Daddy, Love U.....
宝贝,生日快乐!Mummy & Daddy, Love U.....
Wednesday, March 14, 2012
Okashi Chocolate Chiffon Cake
Super nice recipe from Okashi. Love this rich and moist chiffon cake so much. I am using this chocolate sponge cake as the Barney Cake base as well.
1st Barney Cake
1st Barney Cake in my life. This is just a prelim cake for prasticing. The real one shall be coming up soon in next 2 weeks. :P
Subscribe to:
Posts (Atom)


